Since stone countertops are a long-term investment in your home, it’s likely you’ve never gone through the process before. You may be curious to know what goes on during installation or how long it takes to complete your kitchen granite or what are the things you need to do before our team comes to install.
For your peace of mind, here is a detailed article about what you can expect when our install team comes to install your beautiful new countertops.
Getting Ready for the Install Team to Arrive
Before our skilled installers pull into your driveway, there are a few things we need you to do:
- Make sure there is a clear pathway between the job site (your kitchen or bathroom or basement whichever is the case) and closest entrance.
- Stone is heavy, so we try to minimize how much maneuvering the guys need to do while carrying the individual sections of countertop into your kitchen or bathroom.
- If you have small children, for their safety, please make them not to come in the way of carrying the stone.
- You may need to cover nearby furniture or article to protect them from dust, in case you have a cooktop cutout.
- If it is a new construction site, other artisans may be working simultaneously. In that case you need to request them to stop their work at least until all the stone pieces are carried and placed on the cabinets.
- Home owner or their contractor (who can make decisions on behalf of the owner) need to be present during the installation process. Our install team will go over the details of the install and take an approval before leaving the site.
What Should You Do During the Installation?
We want the installation to be as efficient as possible, but we also want you to feel comfortable with the process. If you have any questions, please ask them before our installers start bringing in the granite. They will of course be ready to answer any questions you have after the installation.
Installing stone countertops requires a lot of focus and precision. Our teams have developed proven game-plans that allow each team member to get their task done- trusting that their partners are following the time-table and preparing for the next task.
So, it’s best to allow our craftsmen to work uninterrupted. Of course, you are welcome to watch (we think it’s pretty interesting), and we even ask that you stay nearby to answer any questions that may come up during the process.
Removing Existing Countertops
If you have existing countertops and you or your contractor does the removal of old countertops, they need to be removed completely before our team arrives at your home. Make sure that the countertops are removed entirely including any sinks or cooktop etc. so only cabinets are visible.
In case removal of existing countertops is part of our project, our team will carefully remove them from the cabinets, trying their best to avoid any damage to the cabinet or wall. If you have laminate counters with backsplash, sometimes a bit of the wall plaster will come off with the old counters. Don’t worry; usually your new granite or tile backsplash will cover up those marks. If not, they are easy to patch by your contractor.
Carrying Your New Stone across the threshold
Once AMF Granite installers have made sure the space is ready, they will begin carrying in the individual pieces of granite. Since granite is a natural material and very heavy, most kitchens will have several sections of stone that will be expertly seamed together during the installation.
Once it is laid on a level surface, you will never have to worry about your granite, marble, soapstone, or quartz cracking, but our team will use extra care in moving the pieces, since unsecured granite is not as stable.
Ensuring That every cabinet is Level and Secured
It is very important that the cabinets are as level as possible and completely secured to the wall before the granite is put in place. In case of free standing islands, all the cabinets of island need to be securely anchored to the floor. This protects the stone from tipping hazard.
Our guys won’t need to spend as much time with the level tool if your cabinets are new, but this is an important step for any installation. If this step is done correctly, you won’t have to think about replacing your countertops for the lifetime of your home.
If cabinets are completely out of level, and the unevenness cannot be rectified by placing shims under the new granite countertops, then the cabinet contractor needs to level the cabinets.
Obviously it a very unpleasant situation for the home owner and a labor time wastage for granite company.
In order to prevent such unforeseen situations, AMF Granite recommends the removal of existing countertops before the measurement is done.
That way the levelness and sturdiness of the cabinets may be evaluated well before the installation day, preventing the unpleasant last minute surprises.
That is why we put so much emphasis on maintaining a highly trained staff with years of experience. Any variations in the plane will be offset with small, wood shims as the granite or other surface is laid down (a shim is a thin, wood wedge cut specifically for the home improvement industry).
If you have chosen an under-mount sink (which is the most common type of sink installation), at this point one of the installers will attach our rail or clip system for keeping that sink nice and snug up under the granite.
Putting the Granite in Place, Setting the Seams, and Caulking
Once the cabinets are found to be within the permissible levels, our installers will lay the pieces of the granite in place on the counters. Then they will use an epoxy at the seams to cement the pieces of marble, granite, soapstone, or quartz to each other.
There are two types of epoxy: clear and a neutral color, which we color and blend onsite to carefully match your countertop color. As soon as the seams are dry, they will carefully skim off excess epoxy with a razor blade to ensure the seam is as smooth as possible. Then the granite will be further secured to the cabinet with onsite prepared attachment blocks called ‘bondo blocks’.
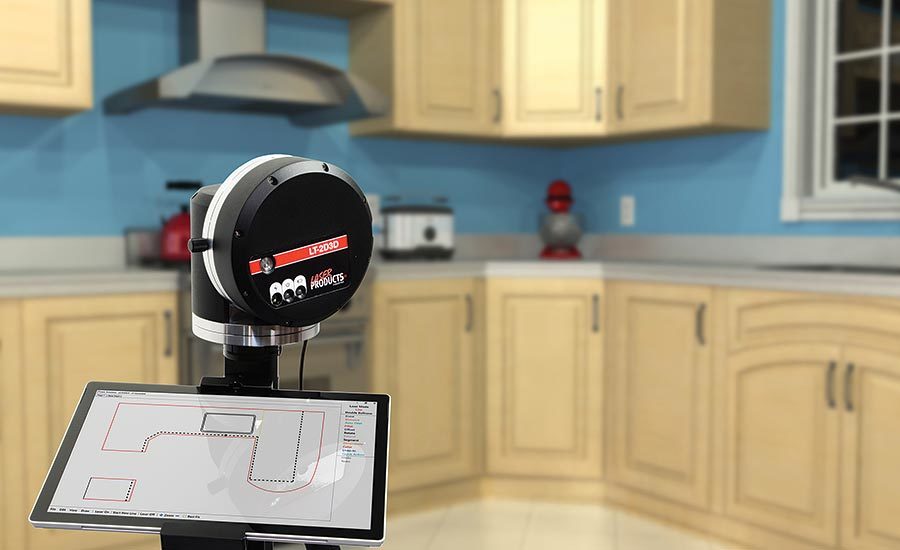
It’s important to note here that no wall is perfectly straight, not even in brand new homes. We capture the imperfections by our digital templating system while measuring your countertops and scribe the backside of the granite counters to match the imperfections of the wall.
But in-spite of these best stone fabrication methods, you may see some gaps between the backside of the granite counters and the wall.
It may bother some home owners, but good news is that your tile or granite backsplash will cover that up completely.
Backsplash & Cooktop Cutout
If you have ordered matching granite backsplash, the guys will probably need to make some minor adjustments to those pieces for a tight fit before installing them and setting the seams in the same way as the decks (the main, horizontal pieces of countertop).
If you have a cooktop (as opposed to a slide in range), the installers may need to cut the hole for it out on-site.
With many stones, it is risky to try and transport the stone all the way to your house with that large of a hole. So, our craftsmen back at the shop will usually create notches (get the cuts started). Then the installers will finish the cuts of cook-top inside once the stone is set on the counters. If we need to do it inside, we will use at least one shop vacuum to collect the dust as we cut.
Even though we clean up afterwards, you probably will get a little dust in your home around the job site.
That is why we advise homeowners to keep any nearby furniture or house hold objects to be covered and protected from the dust.
Wrapping up the Details and Cleaning Up
Once all the stone is secured in place, the team will use acetone or denatured alcohol to remove any excess epoxy, caulk, and any dust leftover from the cooktop or faucet hole cutting. We’ll clean and seal your counters, clean up the job site as much as possible, give you instructions on how to clean and care for your counters, thank you for your business, request you to sign the job approval and leave you to admire your new countertops.
How Long It Takes from Start to Finish of Granite Installation
It depends on the size, complexity and number of cutouts of the job. For smaller and simpler kitchens may take about 2 to 3 hours and large and complex kitchens may take 6 to 7 hours.
Average sized kitchens (around 60 Square feet of counter space) will take about 4 hours from start to finish.
- Customers’s representative must be able to make decisions on issues which may arise during the installation. They will be required to sign the completion forms at the conclusion of the installation and pay remaining balance .
- All seams will be placed at the discretion of AMF Granite Every effort will be made to indicate seam locations during the templating of your project. AMF reserves the right to move seam locations as needed to cut around inclusions, cracks, or other major irregularities within the slab, or to maximize slab usage. No financial compensation will be allowed for the movement of seams.
- AMF’s standard procedure for undermount sinks is to have a 1/8” to ¼” overhang into the bowl. This is called a negative reveal. Deviation from standard procedures, if it is requested by the customer, must be made in writing by the customer. Aesthetics, hygiene, and engineering factors are the reasons for AMF’s “Standard” practices of negative reveal installations. Cutouts for undermount sinks will be made to follow the sink Manufacturer’s specifications upon written request. Overhangs may vary, as sinks may vary slightly in size and shape.
- Overhangs at the cabinet are designed to cover or hide inconsistencies of the cabinets. Overhangs will vary slightly over the length of the top. Standard overhang for granite countertops is 1.5”.
- Standard backsplash height is 4”. AMF Granite will not be responsible if the backsplash does not cover paint or wallpaper lines. It is the Customer’s responsibility to have electrical outlets moved to miss the backsplash or to be included within the backsplash. This must be done prior to the installation. If a backsplash height other than 4” is desired, it is the CUSTOMER’S responsibility to make that request.
- AMF Granite prefers the dishwasher to be installed prior to our arrival. Many dishwasher models have removable clips. You can move them from the top, to the sides of your unit and attach the dishwasher to your cabinets. If you need assistance with this, or if your dishwasher does not have this option, communicate with your Project Manager about a solution. Should a dishwasher clip become unattached at a later date it will be the responsibility of the homeowner to reattach it.
- The plumbing for undermount sinks may be reattached 24 hours after the installation of the new countertops. Reattaching the plumbing before the sink has had time to set may result in the sink moving or dropping. If this occurs, it will be the owner’s responsibility to correct.
- The tear-out and installation of countertops is a major construction process. Cooktops and surface-mounted sinks might be cut on-site to reduce the risk of breakage. THERE WILL BE DUST generated during this process.
- Owner should remove or protect any items in or under the cabinets. You may want to drape or cover the area to contain dust. Construction site will be left broom clean. Dust will settle for hours after the installation is over. Customer is responsible for this clean up.
- Mirrors that are permanently affixed to the wall and rest on or within 1” above the top of the existing backsplash or countertops must be removed before the tear-out of the existing bathroom countertops. Any damage to mirrors not removed will be the responsibility of the homeowner.
- Installers are not allowed to move or reinstall appliances.
- It is the responsibility of the homeowner to provide a safe area for our installers to work. There will be many trips between the jobsite and the installation vehicle. The pathway should be clean and clear of debris as well as items of value such as statues, paintings, vases, and other items, which may be damaged. Granite pieces are very heavy and difficult to maneuver. Children and animals should not be allowed near the jobsite. Homeowner should indicate what area is acceptable to use for cutting and staging of material.
- AMF caulks stone-to-stone. If AMF is asked to caulk wall-to-stone, it will be with paintable latex caulk. Color matched caulk is NOT provided by AMF .


